Let's face it: commercial tractor weights can break the bank. But what if you could build your own, saving money and boosting your tractor's performance? This guide provides several DIY methods, highlighting pros, cons, and crucial safety considerations, empowering you to become a more resourceful and cost-effective farmer. For added stability, consider tractor stabilizers.
Methods & Materials for DIY Tractor Weights
Several effective techniques exist for crafting your own tractor weights. We'll explore four popular options, each with its unique advantages and disadvantages. Remember: safety is paramount throughout this process!
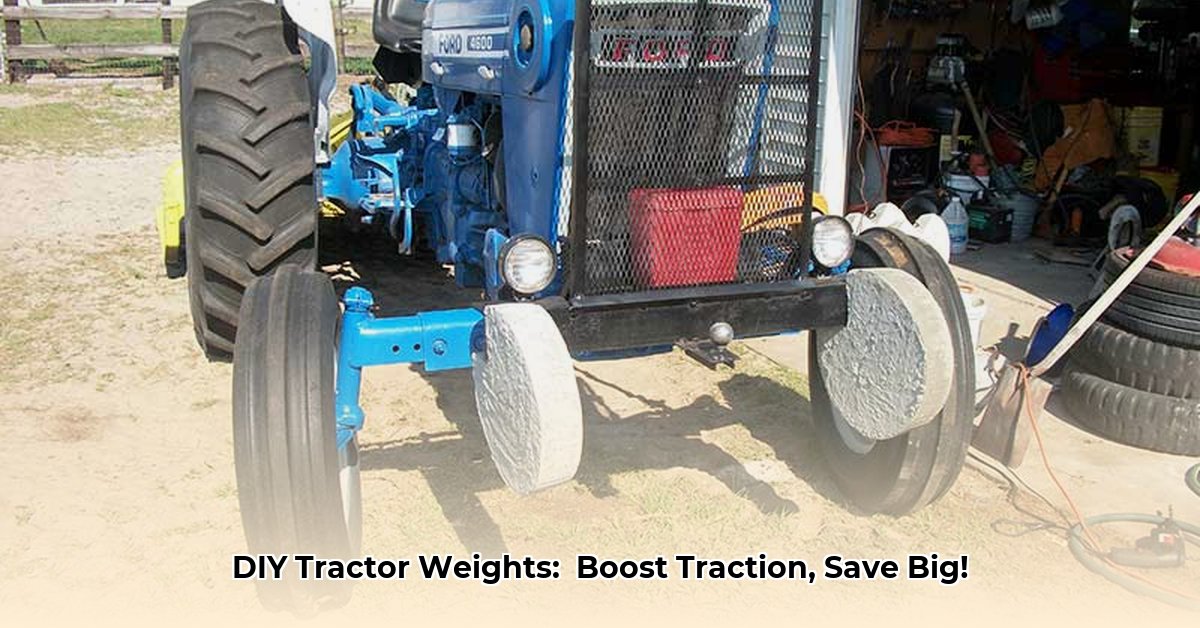
1. Concrete Weights: Sturdy and Simple
This beginner-friendly method uses readily available materials.
- Materials: Portland cement, aggregate (gravel or sand), water, a sturdy mold (metal box, plastic bins, or PVC pipe).
- Tools: Shovel, mixing bucket (wheelbarrow ideal for larger batches), measuring cups/scale, heavy-duty gloves, safety glasses.
- Instructions:
- Prepare the mold: Ensure it's clean, strong, and leakproof.
- Mix the concrete: Follow cement bag instructions for water-to-cement ratio. Gradually add aggregate, mixing until you achieve a consistent, thick consistency.
- Pour and settle: Carefully pour the mixture into the mold, tapping gently to eliminate air bubbles.
- Cure: Let the concrete cure for at least a week, misting with water occasionally to keep it moist.
- Unmold: Carefully remove the weights from the mold once cured.
- Pros: Relatively inexpensive, durable, customizable.
- Cons: Requires curing time, can be messy, heavy to move.
Did you know? Properly cured concrete weights can last for years, providing a significant return on your initial investment of time and materials.
2. Scrap Metal Weights: The Recycler's Delight
This method offers exceptional durability but requires welding experience and a safe workspace.
- Materials: Scrap metal (steel plates, bars), welding machine, welding rods, rust-preventative paint.
- Tools: Cutting torch/metal saw, welder, grinder, safety gear (welding mask, gloves, respirator), good ventilation.
- Instructions:
- Design & cut: Measure and cut scrap metal to your desired shapes and sizes.
- Weld: Carefully weld pieces together, ensuring strong, even welds.
- Finishing: Grind down welds, remove sharp edges, and apply rust-preventative paint.
- Pros: Extremely durable, potentially inexpensive, recycles scrap metal.
- Cons: Requires welding skills, can be dangerous (proper ventilation is essential), physically demanding.
According to Dr. Anya Sharma, Agricultural Engineer at Purdue University: "Utilizing scrap metal for tractor weights not only reduces waste but also provides a cost-effective solution. However, proper safety measures during the welding process are essential."
3. Repurposed Wheel Weights: Proceed with Caution!
Used wheel weights offer an inexpensive option, but lead content poses serious health risks and potential regulatory issues.
- Materials: Used wheel weights (from a tire shop), mounting hardware.
- Tools: Drill, wrenches, heavy-duty gloves, respirator (for lead dust), safety glasses.
- Instructions: Securely attach weights to your tractor using appropriate hardware.
- Pros: Relatively inexpensive, readily available.
- Cons: Extremely hazardous (lead is toxic), requires proper disposal, significant environmental and health concerns.
Is it worth the risk? Considering the serious health hazards associated with lead, exploring alternative methods is strongly recommended.
4. Simple Fill-and-Go Weights: Quick and Easy
This is the easiest method, suitable for temporary use or when durability isn't critical.
- Materials: Sturdy containers (5-gallon buckets, metal drums), sand, gravel, or pea gravel.
- Tools: Shovel or scoop.
- Instructions: Fill containers with chosen material; secure containers to prevent spillage.
- Pros: Very easy, inexpensive, uses readily available materials, easily adjustable weight.
- Cons: Least durable, material can shift, containers may degrade over time, less efficient weight distribution.
Fact: A well-designed set of DIY tractor weights can significantly improve traction, especially on uneven or slippery terrain.
Choosing the Right Method: A Personalized Approach
The optimal method depends on your skills, resources, and tractor type. Beginners might opt for concrete weights or the fill-and-go approach. Experienced welders may choose scrap metal. Avoid lead weights unless absolutely necessary.
Regulatory Compliance and Legal Considerations
Check local and state regulations concerning homemade tractor weights. This is especially critical for lead-containing weights. Contact your local agricultural extension service for guidance to ensure compliance with all applicable laws and safety regulations.
Conclusion: Weighing Your Options
Building homemade tractor weights offers significant cost savings and resourcefulness. However, always prioritize safety and adhere to all applicable regulations. Responsible practices ensure both your safety and compliance with local laws. Further resources on safe and effective DIY farming techniques are readily available through your local agricultural extension service and online farming forums.